Introduction
If your vape isn’t tasting right or the clouds are getting weak, it might be time for a vape coil replacement. Don’t worry—changing your coil is easier than it sounds, and it can make a big difference in how your vape performs. Whether you’re new to vaping or just need a quick refresher, this guide will walk you through everything you need to know about replacing your vape coil the easy way. Let’s get started and bring back that fresh flavor and smooth vapor!
What is Vape Coil Replacement?
Vape coil replacement is the process of removing the old, worn-out coil from your vape device and installing a new one. The coil is a small, but important part of your vape—it’s the piece that heats up the e-liquid and turns it into vapor. Over time, the coil can burn out or get clogged with residue from your e-juice, which leads to burnt tastes, less vapor, and poor performance.
Replacing the coil brings your vape back to life. It helps restore flavor, improve cloud production, and gives you a smoother, more enjoyable vaping experience. Most coils need to be changed every 1 to 2 weeks, depending on how often you vape and what kind of e-liquid you use.
Why is Vape Coil Replacement Important?
Replacing your vape coil regularly is essential for keeping your device working properly and your vaping experience enjoyable. Here are a few key reasons why vape coil replacement matters:
Better Flavor
Old or burnt coils can leave a harsh, burnt taste in your mouth. When you replace the coil, you bring back the true flavor of your e-liquid—whether it’s fruity, dessert-inspired, or classic tobacco.
Improved Vapor Production
A fresh coil heats the e-liquid more efficiently, creating bigger, smoother clouds. If your vape isn’t producing as much vapor as it used to, the coil is likely the reason.
Prevents Burnt Hits
One of the worst things a vaper can experience is a burnt hit. This happens when the coil’s cotton is dry or damaged. Replacing the coil in time helps you avoid that unpleasant burnt sensation.
Stops Leaking and Gurgling
Worn-out coils can cause leaks or gurgling sounds in your tank. A new coil fits properly and helps maintain a tight seal, reducing the chance of messy leaks.
Extends the Life of Your Vape Device
Regular coil replacement keeps your device in better shape over time. It reduces stress on the battery and other components, helping your vape last longer.
Saves Money in the Long Run
Using a damaged coil can cause problems with your device, potentially leading to costly repairs. Replacing your coil on time is a simple way to protect your investment.
Step-by-Step Guide to Vape Coil Replacement
Replacing a vape coil might seem tricky at first, but it’s actually a quick and straightforward process. Follow these steps to replace your coil the right way:
Step 1: Turn Off Your Vape Device
Before doing anything, make sure your device is turned off. This prevents accidental firing and ensures your safety while handling the tank.
Step 2: Remove the Tank or Pod
Detach the tank (or pod) from the battery part of your vape device. If it’s a pod system, you may need to pull or slide the pod out, depending on the model.
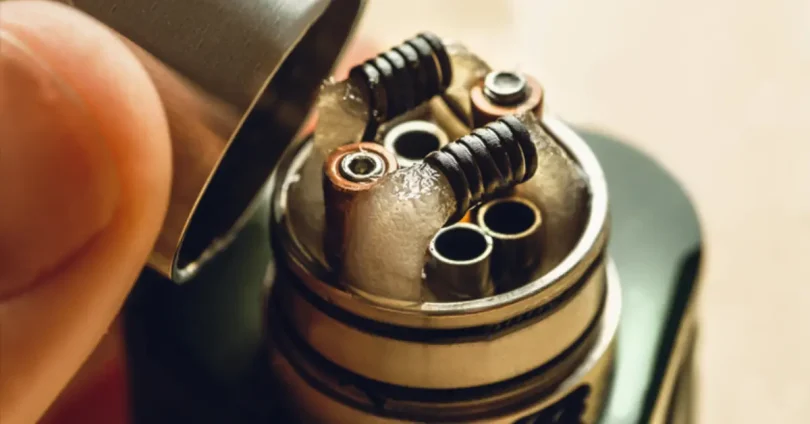
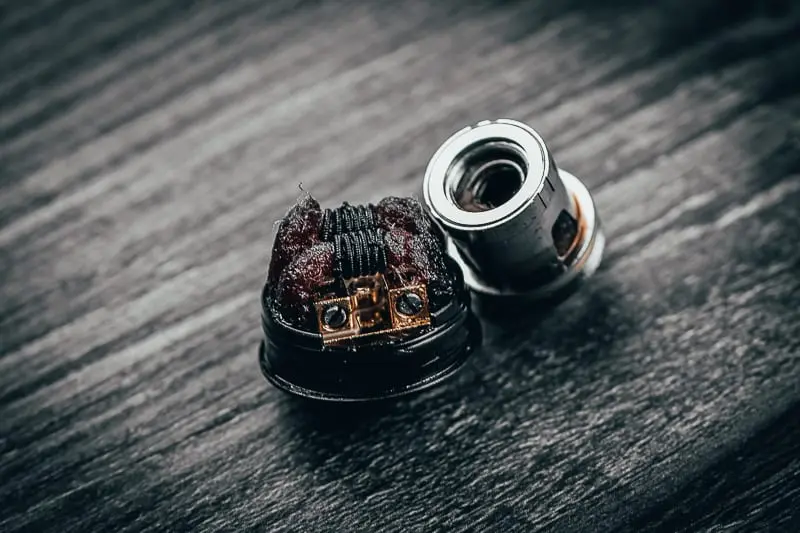
Step 3: Unscrew the Tank and Remove the Old Coil
Open the tank by unscrewing the base or top, depending on the design. Locate the old coil—usually found at the center or bottom of the tank—and carefully unscrew it. If it’s stuck, use a tissue for better grip.
Step 4: Clean the Tank (Optional but Recommended)
Take this chance to clean your tank. Rinse it with warm water and let it dry completely. This helps remove old e-liquid residue and keeps your vape fresh.
Step 5: Prime the New Coil
Before installing the new coil, add a few drops of e-liquid directly onto the cotton inside the coil openings. This is called priming and it helps prevent dry hits by saturating the cotton.
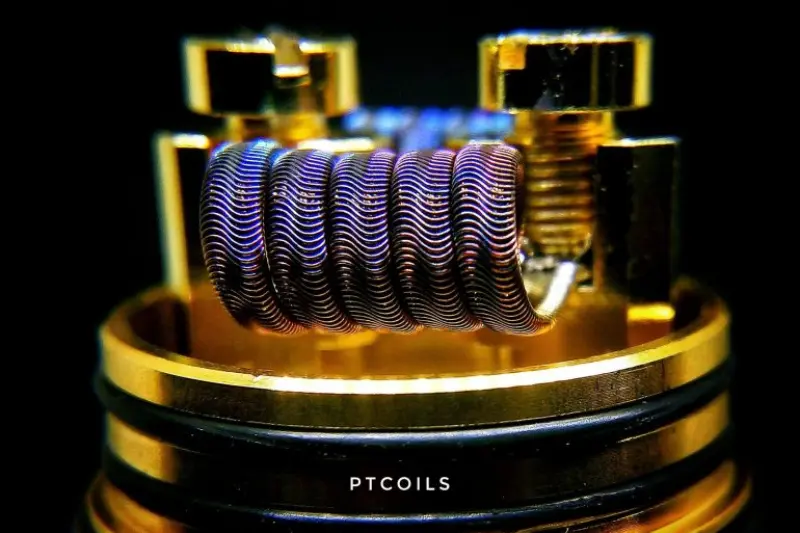
Step 6: Install the New Coil
Screw the new coil into the same spot where the old one was removed. Make sure it’s firmly in place, but avoid overtightening.
Step 7: Reassemble the Tank and Fill with E-liquid
Put the tank back together and fill it with your preferred e-liquid. Be sure not to overfill—follow the fill line if your tank has one.
Step 8: Let the Coil Soak
Once filled, let the tank sit for 5–10 minutes. This gives the e-liquid time to fully soak into the coil’s cotton before you start vaping.
Step 9: Start Vaping Slowly
Turn your device back on and begin with a few light puffs. If your vape has adjustable wattage, start at a lower power setting and gradually increase to your preferred level.
Advantages and Disadvantages of Vape Coil Replacement
| Advantages | Disadvantages |
|---|---|
| 1. Better Flavor – Restores the taste of your e-liquid. | 1. Ongoing Cost – Coils need to be replaced regularly, which adds up. |
| 2. Improved Vapor Production – Fresh coils produce bigger, smoother clouds. | 2. Messy Process – Replacing coils can be messy, especially with full tanks. |
| 3. Prevents Burnt Hits – Avoids harsh and unpleasant burnt tastes. | 3. Learning Curve – Beginners may find the process confusing at first. |
| 4. Extends Device Life – Reduces strain on your device, keeping it in good condition. | 4. Waiting Time – You have to wait for the coil to soak before vaping. |
| 5. Reduces Leaks and Gurgling – A fresh coil fits better and improves performance. | 5. Compatibility Issues – Finding the right coil for your tank can be tricky. |
Frequently Asked Questions (FAQs) About Vape Coil Replacement
How often should I replace my vape coil?
Most people replace their coil every 1 to 2 weeks, but it depends on how often you vape and the type of e-liquid you use. If you notice a burnt taste, weak flavor, or less vapor, it’s probably time for a new coil.
Can I clean and reuse my coil instead of replacing it?
Some users rinse their coils with warm water to extend their life a little, but it’s only a short-term fix. Coils are meant to be replaced regularly for the best performance.
What happens if I don’t replace my vape coil?
If you keep using an old coil, you might experience burnt hits, poor flavor, and even damage to your vape device over time. It also makes your overall vaping experience much less enjoyable.
Do all vape devices use the same coil?
No. Each vape model usually has its own type of coil. Always check the coil compatibility with your specific tank or pod before buying a new one.
What does “priming a coil” mean?
Priming means adding a few drops of e-liquid to the coil before using it. This helps soak the cotton inside and prevents dry or burnt hits when you first vape.
Conclusion
Replacing your vape coil might seem like a small task, but it makes a big difference in how your device performs. A fresh coil gives you better flavor, smoother clouds, and helps your vape last longer. With a little practice, changing your coil becomes quick and easy. Just remember to watch for signs like burnt taste or low vapor, and swap it out when needed. Keep your coil fresh—and enjoy a better vaping experience every time!